
Why Small House Problems Cost More the Longer You Wait
A roof nail that cost $100 to fix led to a $3,000 ceiling repair. Here's why small problems grow, what New Jersey home insurance usually leaves to you, and where to look.
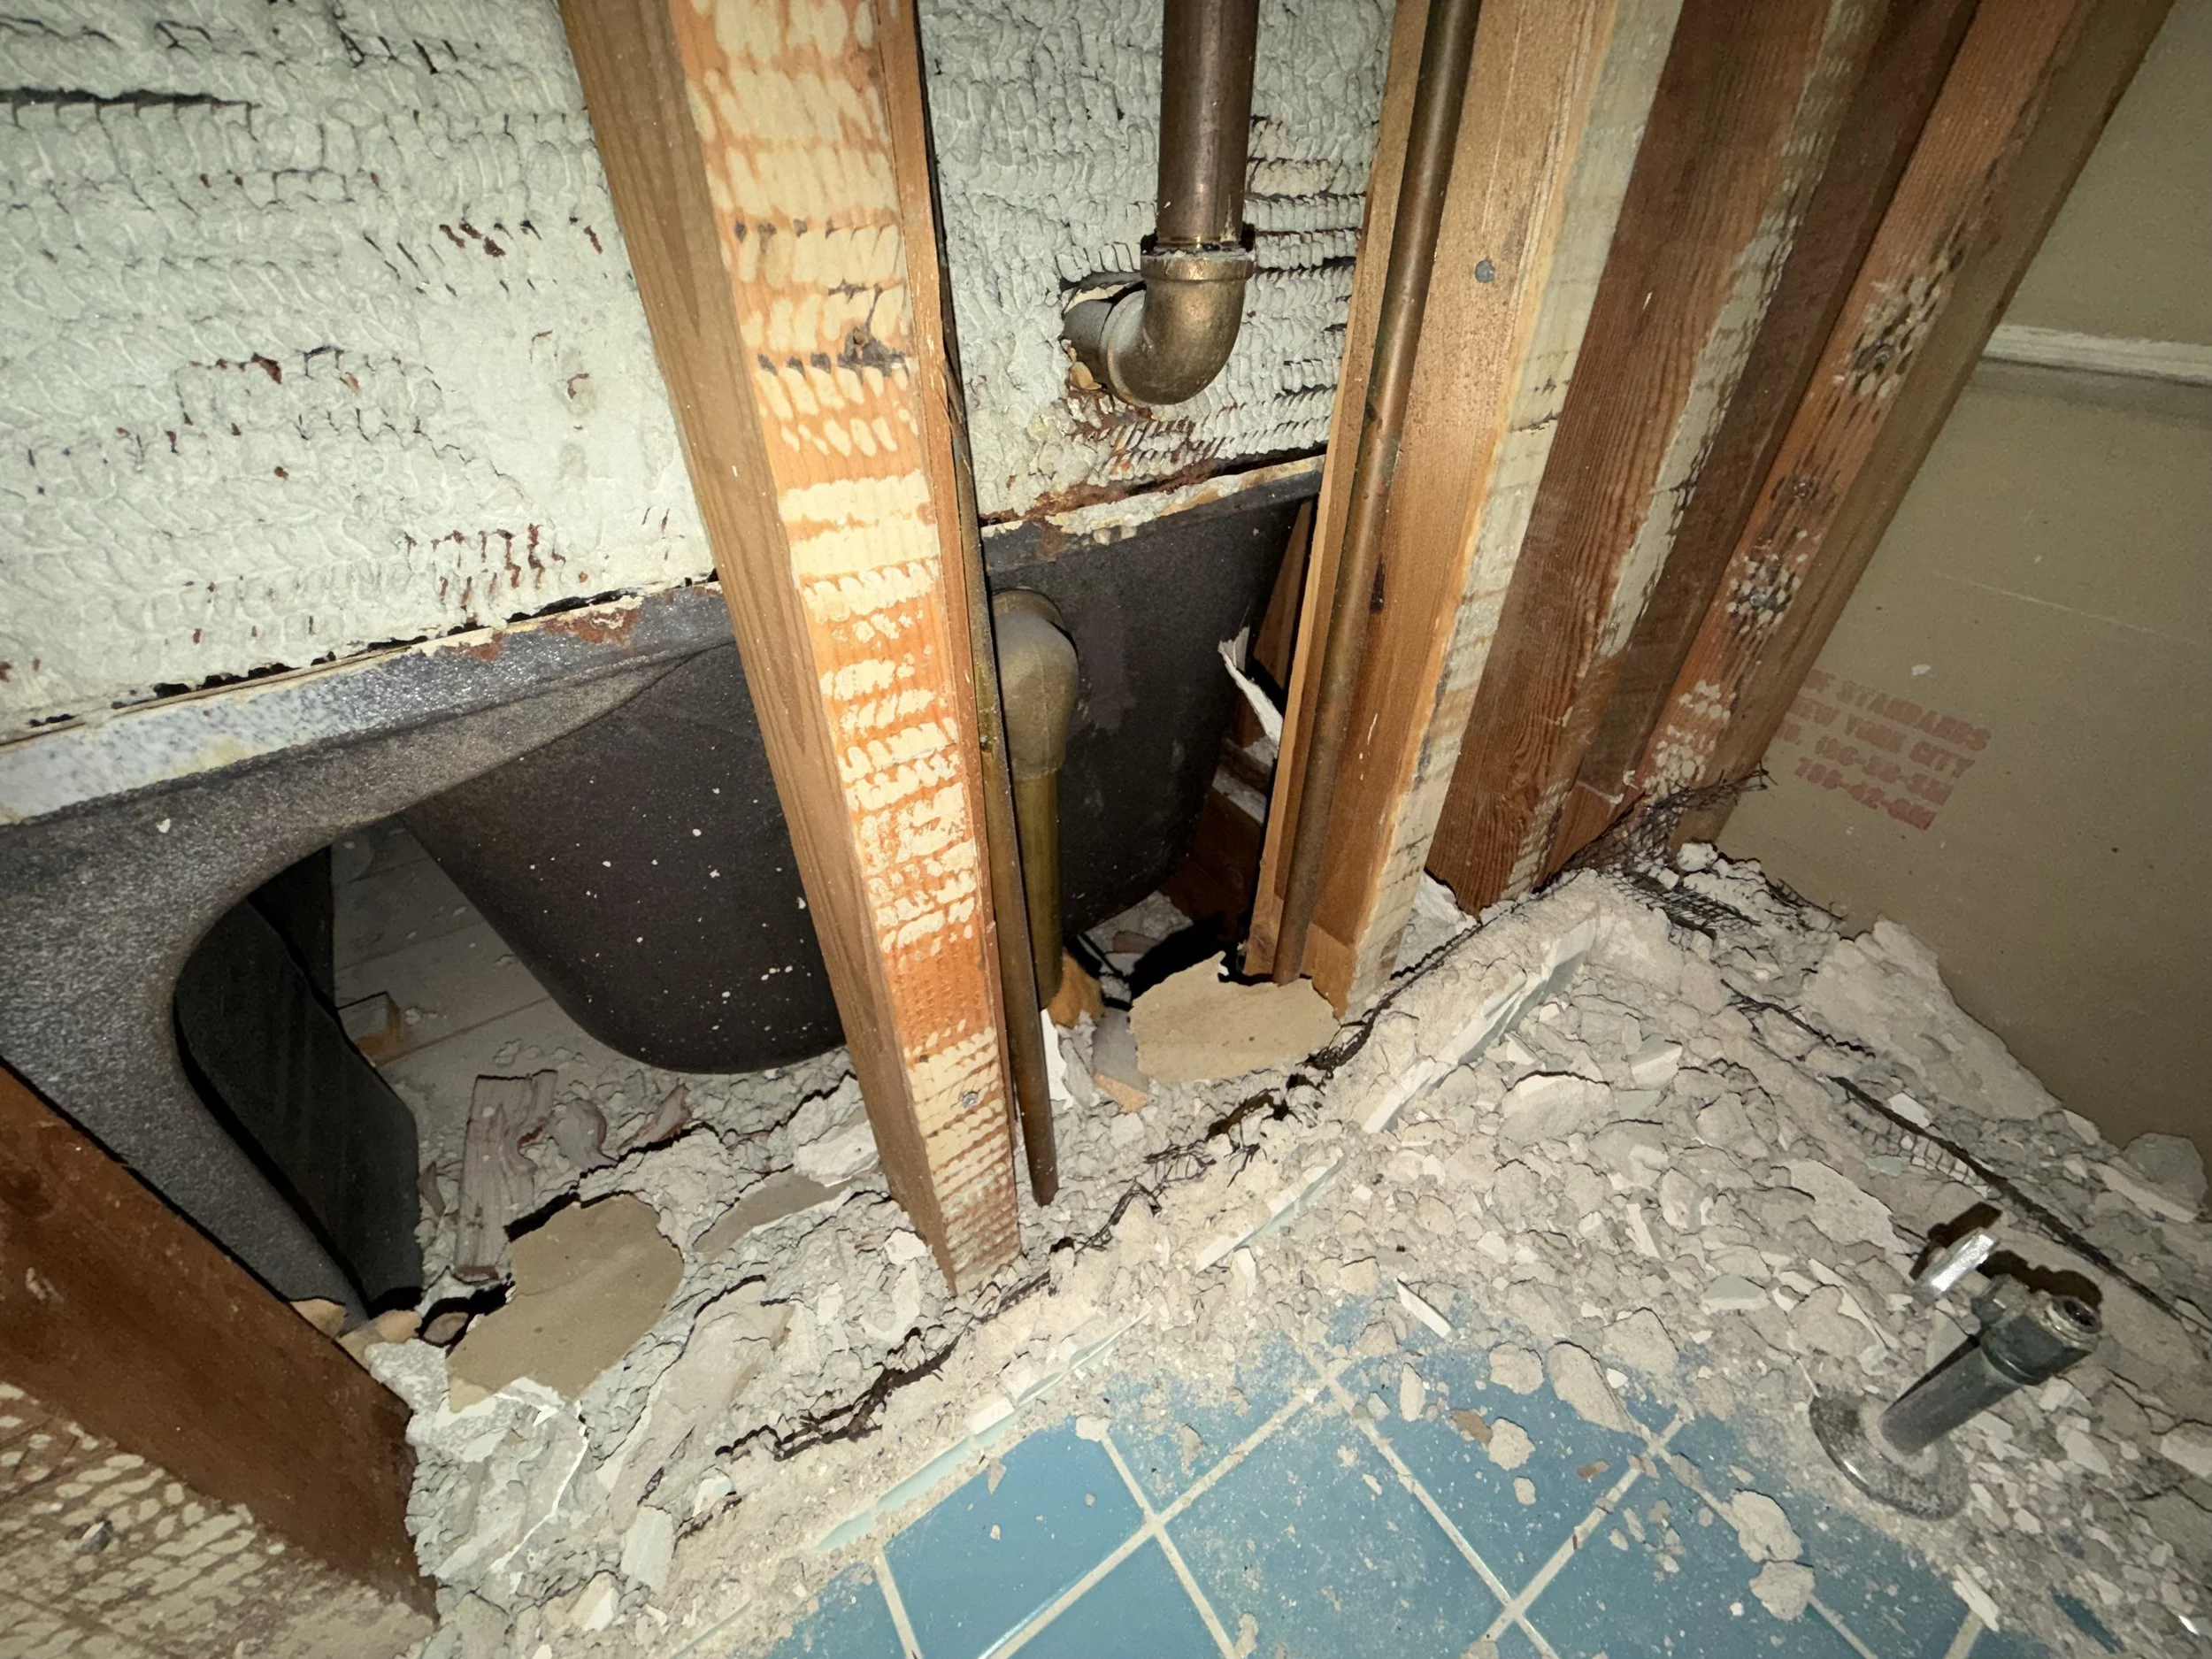
Yes. A small problem fixed early almost always costs less than the same problem found late, because water, rot and pests keep working whether anyone is looking or not. In a Summit house we look after, the roof repair cost about $100. The wet ceiling and mold it had already caused cost about $3,000 to put right.
Why do small house problems turn into big ones?
Small house problems turn into big ones for four reasons, and they stack on top of each other.
- Water travels. It runs down roof boards, along pipes and through floors, so the damage often ends up a room or a floor away from the leak.
- One problem invites the next. Damp wood rots, damp corners grow mold, and damp basements draw in mice and spiders.
- The longer it runs, the more of the bill is yours. Insurance usually pays for sudden damage, not slow damage. More on that below.
- Waiting costs more on its own. In Thumbtack's 2026 report on American homes, nearly two out of three homeowners said they paid more for a repair because they waited, and prices in the 20 most common repair categories rose 22% over five years.
The Insurance Information Institute puts the average water damage or freezing claim at $15,400 for 2019 to 2023. That's only the damage insurance agreed to pay for. Most of what we do on our regular home maintenance visits comes down to catching the $100 version instead.
Does homeowners insurance cover a slow leak in New Jersey?
Homeowners insurance in New Jersey usually covers water damage that's sudden and accidental, and usually doesn't cover damage that built up slowly. The state's banking and insurance department publishes a model one-page summary of a New Jersey homeowners policy. It lists sudden and accidental water damage as covered. On the not-covered side it lists:
- water damage from continuous and repeated seepage
- wear and tear, rotting and maintenance
- mold, unless it comes from a covered loss
- termites, insects, rats, mice, birds and other vermin
- freezing pipes, unless the water was shut off or the building was heated
- losses while the house is vacant longer than the policy allows
Think of it like car insurance. It pays for the crash. It doesn't pay for the tire you drove on half flat for a month.
That summary is a template, and your own policy is the contract that counts. Read the exclusions on yours, or ask your agent how they define a gradual leak. But the pattern is the same almost everywhere: the sudden stuff is insurance's problem, and the slow stuff is yours.
What happened with the bathroom ceiling in Summit?
The homeowner noticed paint peeling on the bathroom ceiling and put it down to steam from the shower. That's a reasonable guess. It was wrong.
The roof had been replaced about five years earlier, and one nail sat slightly proud instead of flush. Over the winters, the weight of snow pressed the shingle onto the nail head until it poked through and broke the shingle's seal. Rain got in through a hole smaller than a pencil eraser.
The ceiling was old plaster, so the water never came through as a drip. You could only tell from the peeling paint and a faint softness that the ceiling was holding moisture. Above it, the water had started to run down the slope of the roof boards toward the framing.
We caught it before the framing needed work. A contractor from our network fixed the nail and resealed the shingle for about $100. The ceiling repair and mold removal came to about $3,000. If that leak had run another winter, the next bill would have included the framing.
How much should you spend on maintenance for a $3 million house?
A $3 million house needs roughly $30,000 to $120,000 a year in maintenance and repairs, using the common rule of thumb of 1 to 4 percent of the home's value. Older houses sit toward the top of that range. It's a rough guide, not a study, but it gives a sense of scale.
Houses here are expensive to keep. According to Redfin, the median sale price in Short Hills was about $2.52 million in August 2026, and the median in Summit was about $1.66 million. Many of the houses we care for in Summit, Short Hills and Millburn are worth well above that, and many were built long before anyone thought about leak sensors.
At that scale the question isn't whether you'll spend the money. You will. The question is whether you spend it on a $100 nail or a $3,000 ceiling, and whether anyone is watching closely enough to give you the choice.
Why isn't noticing a problem yourself enough?
Noticing a problem isn't enough, because the hard part is knowing what you're looking at. The homeowner with the bathroom ceiling did notice the peeling paint. They just read it as shower steam, and anyone would have.
That's common. In the same Thumbtack report, more than half of homeowners admitted misjudging how serious a repair was, and only 22% felt very confident telling a cosmetic problem from an urgent one.
Someone in the house regularly brings three things that are hard to give yourself:
- Eyes that look on purpose, in the attic, the basement and the back of the cabinets, where nobody stands for long.
- Memory. We compare this month to last month. You can't see slow change in something you walk past every day. A stain that grows a little each week looks the same every morning.
- Knowing what a sign means, and who to call about it.
Where do small house problems hide?
Small house problems hide in the places people don't stand for long because they're uncomfortable, dusty or dark. Here's what we look for and what it can become.
- Attic. Dark patches on the roof boards, droppings, flattened insulation. Left alone: a roof leak reaching the framing, or mice nesting.
- Basement walls and corners. White chalky powder, a damp corner, a musty smell. Left alone: rot, mold, and mice and spiders moving in.
- Under kitchen and bathroom sinks. A dried water ring, a swollen cabinet floor. Left alone: a rotten subfloor and damage to the ceiling below.
- Under the toilet tank. A damp connector nut, or a damp wall or floor behind the toilet. Left alone: a leak that runs for weeks, or a nut that breaks and floods the room.
- Water heater. Rust at the base, a damp floor, rusty hot water. Left alone: a tank that fails and floods the basement.
- Sump pump. A backup battery with no date on it. Left alone: a flooded basement when a storm knocks out the power.
- Window corners. Peeling paint, soft wood at the sill. Left alone: rotten frames and water in the wall.
- Ceilings. Peeling or bubbling paint, a faint stain. Left alone: a roof or plumbing leak spreading above.
Which small problems cause the biggest damage?
Water and fire cause the biggest damage in a house, and winter adds a third: water that turns to ice. These are the ones we watch most closely.
The plastic connector nut under the toilet tank
The water supply line meets the toilet at the bottom of the tank, held on by a plastic connector nut. That nut is meant to be tightened by hand. Tightened with pliers or a wrench, it can crack, and forensic engineers who investigate water damage claims have documented these plastic nuts failing. A hairline crack doesn't leak at first. It grows.
Because the nut sits on the supply line, the water behind it is under pressure and never runs out. A slow weep runs down the line, behind the toilet and into the floor, and from there into the ceiling below. It can go on for weeks. If the nut breaks completely, water pours out until someone closes the valve.
We've seen this kind of drip miss a floor leak sensor, the little puck that beeps when it gets wet, because the water soaks into the floor or runs down the wall instead of pooling where the sensor sits. A whole-house monitor on the main water line has a better chance of catching it, as long as it runs a pressure test.
The check takes ten seconds. Look at the nut under the tank, the supply line and the floor and wall behind the toilet, and touch them. If anything is damp or stained, or you can see a crack, turn off the small valve in the wall behind the toilet and call a plumber. If the line is ever replaced, ask for the nut to be hand-tightened.
The water heater's anode rod
A tank water heater has a metal rod inside, called the anode rod, that corrodes so the tank doesn't. When the rod is used up, the tank starts rusting from the inside. Almost nobody knows when theirs was last changed.
Changing the rod is a plumber's job, and we leave it to one. What we do is look at the tank every visit, write down when the rod was changed, and remind you when it's due. We wrote more about flushing a water heater and how often to do it.
The sump pump backup battery
If your sump pump has a battery backup, that battery is what keeps the basement dry when a storm takes out the power. Batteries wear out after a few years whether they've been used or not, and a dead one looks exactly like a good one. Write the install date on the battery with a marker, check the manufacturer's manual for how long it should last, and replace it before then.
Dryer vents and chimneys
A clogged dryer vent is a fire risk with gas and electric dryers alike, and on a gas dryer a blocked vent can also push exhaust back into the house. Here's how to clean a dryer vent and keep it from clogging.
A wood fire is one of the best things about an older Summit or Short Hills house. Every fire also leaves creosote, a tar-like deposit, inside the chimney, and creosote burns. The Chimney Safety Institute of America follows the NFPA 211 standard, which calls for chimneys, fireplaces and vents to be inspected at least once a year. We can book the sweep for the same day we're in the house, so you don't have to be.
Why does the house to-do list get harder to start the longer it gets?
A house to-do list gets harder to start because each item needs a different person. One thing needs a handyman, the next a carpenter, then a finish carpenter, a door person, a plumber, an electrician. So you call none of them. I know this from my own house.
It wears on people more than the money. In the Thumbtack report, nearly one in three homeowners said the emotional side of repairs is the worst part, above cost and time.
Here's the good news. The relief doesn't start when the leak is fixed. It starts the day somebody has a plan for it. Psychologist E.J. Masicampo at Wake Forest, who studied unfinished goals, puts it this way: a specific plan frees up mental energy. It's the same feeling as finally booking the dentist. The tooth still hurts, but you've stopped carrying it around.
We can't do every trade ourselves, and we don't pretend to. But we know people who can. We see a vendor's work on at least one job before we recommend them, and we take no referral fees from anyone, in either direction. If someone we recommended doesn't do right by you, you call us, not them. We go back to them and stay on it until it's sorted.
What changes when someone checks the house every month?
Monthly visits change one thing above all: the gap between visits. On our quarterly plan, Steward Essential, we're in the house four times a year. On Steward Estate we're there every month, for the same four hours each time. Twelve visits instead of four means we know the house well enough to notice when something is different from last month.
It's like seeing a friend every week versus every three months. Weekly, you notice the new haircut. Quarterly, you just notice they look different.
We didn't price Estate by the size of the house, and we don't think we should. Some houses need less attention, and some owners like to keep an eye on things themselves. But on a large or older house, or one that sits empty for weeks at a time, more frequent eyes make sense. Every visit ends with dated photos in the home record, so there's a history of what was found and when. That record is useful to you now, and to whoever owns the house after you.
Monthly visits also mean time to show you things. Where the water shut-off is. Where the gas shut-off is. What that box on the sump pump does. How often does a plumber stand in your basement and explain your house to you? We'll do it every visit if you want.
Put the numbers side by side and decide for yourself. The average water damage claim is $15,400. The ceiling in Summit was $3,000. Both plans and their prices are on our home maintenance page.
When to call a professional
- A stain, soft spot or peeling paint on a ceiling. Don't assume steam. Have the source found.
- Water you can't trace, or a damp floor behind a toilet. Turn off the water at the toilet's shut-off valve and call a plumber.
- Rust at the base of a water heater, or rusty hot water. Call a plumber.
- Anything on the roof. Look from the ground with binoculars and call a roofer. Don't go up.
- A musty smell or visible mold larger than a small patch. Call a mold remediation company, especially if young children or anyone with asthma lives in the house.
- The chimney, at least once a year, by a certified sweep.
- If you smell gas, leave the house and call the gas company or 911 from outside.
Frequently asked questions
How often should someone check a large house?
A large house benefits from a check every month, because there's more of it to go wrong and more of it nobody walks through daily. Monthly visits also mean a slow leak gets weeks to grow, not a whole season. If the house sits empty for long stretches, add checks while you're away.
Will a floor leak sensor catch a slow leak?
A floor leak sensor only catches water that pools where it sits. A slow drip that soaks into the floor or runs down inside a wall can miss it entirely. They're worth having under a water heater or washing machine, but they don't replace someone looking behind the toilet and under the sink.
Will a whole-house water monitor catch a leaking toilet?
A whole-house monitor on the main line can catch a leaking toilet if it runs a daily pressure test, which closes the valve and checks whether the pressure holds. Moen says its Flo test can pick up a drip as slow as one drop per minute, far too little to register as flow. It tells you there's a leak somewhere, not where, so someone still has to go and find it.
Does homeowners insurance cover mold in New Jersey?
New Jersey's model homeowners policy summary lists mold as not covered unless it comes from a covered loss, such as a sudden pipe burst. Mold from a slow leak usually falls on the homeowner. Check your own policy, since terms vary by insurer.
If you'd rather someone else kept an eye on the attic, the basement and everything in between, that's what we do.
The Home Steward is a home management service based in Summit, New Jersey, run by Sebastian and Kory, caring for homes in Summit, Chatham, Short Hills and Millburn.

Why Your Sealed Marble Countertop Still Gets Dull Spots
Dull rings on a marble counter usually aren't a failed sealer. They're etch marks from acid, and they're easier to prevent than most people think.
Those dull, cloudy spots on a marble countertop are almost never a failed sealer. They're etch marks: acid from lemon, wine, vinegar or tomato reacting with the stone itself. Sealer helps stop stains from soaking in, but it does nothing against acid. Light etching can be polished out at home. Deep etching is a job for a stone restoration specialist.
We see this often. In kitchens across Summit, Chatham, Short Hills and Millburn, homeowners point at dull rings and cloudy patches on their Calacatta and ask two things: did the sealer fail, and can the marble be restored? The answer to the first is usually no. The answer to the second is usually yes, and it's work we coordinate through Steward Projects with a stone specialist we've worked with before.
Why does sealed marble still get dull spots?
Sealed marble still gets dull spots because sealer protects against stains, not acid. Marble is mostly calcite, the same mineral as a seashell. Drop a seashell in vinegar and it slowly dissolves. The same thing happens on a tiny scale when lemon juice sits on a marble counter. The acid eats a thin layer off the surface and leaves a dull mark where the polish used to be.
That mark is an etch. It isn't dirt and it isn't a stain, so no cleaner will wipe it away.
The Natural Stone Institute's consumer guide says plainly that sealers don't protect stone from acid. That's why a counter can be freshly sealed and still etch the first time someone squeezes a lime over it.
The usual culprits in a kitchen:
- Lemon, lime and orange juice
- Wine
- Vinegar and salad dressing
- Tomato sauce and ketchup
- Cola and other soft drinks
- Cleaning sprays made with vinegar or citrus
How can you tell an etch from a stain on marble?
An etch on marble is lighter and duller than the stone around it. A stain is darker. That's the quickest way to tell them apart.
Signs it's an etch
- Looks: a dull, cloudy or lighter spot, often a ring from a glass
- Feels: sometimes slightly rough under your fingertip
- Caused by: acid, like lemon, wine or vinegar
- Does sealer help? No
Signs it's a stain
- Looks: a darker spot, the color of whatever spilled
- Feels: smooth, like the rest of the counter
- Caused by: something that soaked in, like oil, coffee or wine
- Does sealer help? Yes, it slows it down
The easiest way to spot etching: crouch until your eye is level with the counter, face a window, and look across the surface. Etches show up as dull patches in the shine. Red wine can do both at once, etching the surface and staining underneath.
What does marble sealer actually do?
Marble sealer slows liquids from soaking into the stone, which gives you time to wipe up coffee, oil or wine before it leaves a stain. Think of it like stain guard on a sofa. It buys you time to blot a spill. It won't stop bleach.
To check whether your sealer is still working, put a few drops of water on a spot that gets heavy use, near the sink or the stove. Leave it 10 to 15 minutes, wipe it dry, and wait about 10 minutes more. If the stone looks darker where the water sat, the sealer is worn there and it's time to reseal. If it looks the same, the sealer is doing its job.
Resealing won't remove etch marks. It only protects against the next stain.
What's the most important thing you can do for marble?
The most important habit for marble is wiping up anything acidic the moment it lands. Etching starts as soon as acid touches the stone, so speed matters more than any product you can buy. A damp cloth, then a dry one. That's it.
What should you never use on marble?
Never clean marble with vinegar, lemon, or any cleaner made with them. If we could put one rule on every fridge in a marble kitchen, it would be this one.
Many "natural" and homemade cleaners are built on vinegar or citrus. Used every day, they don't leave one etch mark. They take the polish off the whole counter a little at a time, which is why some marble looks dull everywhere rather than spotted.
Keep these off marble too:
- Bleach and ammonia
- Limescale and rust removers
- Scouring powders and abrasive pads
- Bathroom cleaners not labeled safe for natural stone
Simple ways to care for marble countertops every day
Daily marble care is mostly about what you put down on it:
- Clean with a pH-neutral stone cleaner, or a few drops of mild dish soap in warm water. Dry with a soft cloth.
- Use coasters under every glass, especially wine, juice and cocktails.
- Keep oil bottles, vinegar, soap dispensers and fruit bowls on a tray.
- Slice lemons and tomatoes on a cutting board, never straight on the stone.
- Put hot pans on a trivet.
- Do the water test every few months and reseal when it fails.
Can etched marble be restored?
Etched marble can almost always be restored. How it's done depends on how deep the damage goes.
Light etch marks
Run a fingernail across the spot. If you can't feel it, it's a light etch. On polished marble, a marble polishing powder used according to the label can often bring the shine back. Try it in a hidden spot first.
Deep or widespread etching
If you can feel the etch, or the whole counter has gone dull, it needs a stone restoration specialist. They hone the marble wet, using diamond pads that go from coarse to fine, then polish it back up. Water carries the dust away as a slurry, so expect plastic sheeting over the cabinets and the kitchen out of use while they work. They can also change the finish, for example from polished to honed.
We don't recommend sanding marble yourself. A regular sander leaves swirls and uneven patches, and fixing that usually means calling the specialist anyway.
Quartzite looks like marble but is much tougher
Quartzite is a natural stone that often has the same white background and grey veining as Calacatta, but it's far harder. True quartzite scratches glass and marble doesn't, and the Natural Stone Institute notes there's no such thing as "soft quartzite". Stone sold under that name is usually marble.
True quartzite doesn't contain calcite, so lemon and wine won't etch it. It can still stain, so it still needs sealing.
If you're choosing new counters, ask the stone yard for a sample and test it before you commit. Drag a sharp edge of the stone across a glass tile: quartzite bites in and scratches it, marble glides. Then put a few drops of lemon juice on the polished face for 5 to 10 minutes and look for a dull spot.
Quartz is something else again: a manufactured slab made from crushed stone and resin. Easy to confuse with quartzite in conversation, very different in the kitchen.
Our honest view: if you love the look of marble but your kitchen sees a lot of lemons and wine, quartzite is worth a serious look.
How we handle marble restoration for our clients
When we're in a home and see etching, or a client asks about their counters, we start by telling them what it actually is: an etch, a stain, or worn sealer. Often the answer is a habit to change, not a repair.
When the marble needs a specialist, we bring in a stone restoration professional from our network, someone we've worked with and seen work. We let them in, stay reachable while they're there, and check the counters afterward. We take no referral fees from anyone we recommend. That's how our project coordination works for every specialist job.
For painting, that means being in the room on prep day. Here's what proper painting prep looks like.
When to call a professional
Call a stone restoration specialist if you see:
- Etch marks you can feel with a fingernail
- Dullness across large areas or the whole counter
- A stain that won't lift
- Chips, especially at the sink edge or on corners
- Cracks, or a seam that has opened or lifted
- Any reason to change the finish from polished to honed
And if you're not sure whether your counters are marble or quartzite, a specialist can tell you in a few minutes.
Frequently asked questions
Does resealing marble remove etch marks?
Resealing a marble countertop does nothing for etch marks. Sealer works inside the stone's pores, while an etch is damage to the surface. Light etches need polishing and deep ones need a specialist.
How often should marble countertops be sealed?
There's no fixed schedule. It depends on the stone, the sealer and how hard the kitchen works. Many stone professionals suggest about once a year, but the water test is the better guide: if a few drops darken the stone after 10 to 15 minutes, it's time.
Is honed marble better than polished in a kitchen?
Honed marble still etches, but the marks are much harder to see because there's no shine to lose. If polished counters etch a lot, a specialist can hone them to a matte finish. Some people love the look and some don't, so see a sample first.
Can I use disinfecting wipes on marble?
Check the label. Many household wipes and sprays contain citric acid or other acids that will etch marble. If it isn't marked safe for natural stone, use a pH-neutral stone cleaner instead.
Is Calacatta marble a bad choice for a kitchen?
No, as long as you know what you're getting. Marble in a working kitchen picks up etch marks over the years, and plenty of people like the lived-in look that gives it. If you want counters that stay looking new, choose a honed finish or look at true quartzite.
If you'd rather someone else kept an eye on your marble and called the right specialist when it needs one, that's what we do.
The Home Steward is a home management service based in Summit, New Jersey, run by Sebastian and Kory, caring for homes in Summit, Chatham, Short Hills and Millburn.

How to Tell If Your Painter Is Doing Proper Prep
Most of a good paint job happens before any color goes on. Here's what proper scraping, patching, priming and floor protection look like, plus what to do about lead paint in an older house..
Proper prep is something you can see before any color goes on. Loose paint is scraped back to edges that stay put, holes and cracks are filled and sanded flush, every patch and bare spot is primed, and the floors are under canvas drop cloths. If a painter's first day looks like that, the job is starting right.
Prep is most of a paint job, and it's the part that looks like nothing is happening. That's why it gets rushed. Kory spent several years on a professional painting crew before we started The Home Steward, and what follows is what we look for when we oversee painting and other home repair projects for clients in Summit, Chatham, Short Hills and Millburn.
None of it needs a ladder or any skill. It needs ten minutes, a flashlight and a willingness to look closely.
If you're still deciding when to paint, here's why winter is a good time to paint inside.
What should a room look like before the first coat?
A room that's being prepped properly is emptied or organized before anyone opens a can. Furniture is out, or pushed to the middle and covered. Switch plates, outlet covers and vent covers are off. The floor is covered from wall to wall, not just where the ladder will stand.
Small things tell you a lot. Screws taped to the back of each cover, or a bag labeled by room, means the painter expects to put your house back exactly as they found it.
Why canvas drop cloths and not plastic?
Canvas drop cloths are what you want on a floor. They lie flat, they stay put when a ladder goes down on them, and a drip soaks in instead of sitting on the surface waiting to be stepped in. The better ones have a rubber or poly backing, so they don't slide on wood and paint can't soak through to the floor.
Plastic sheeting on a floor is slippery under shoes and ladder feet, and a drop of paint stays wet on top of it long enough to be tracked down the hall. Plastic has its place. It's good over furniture, and on jobs where old paint may contain lead, heavy plastic sheeting is part of the rules (more on that below).
Which painter's tape is safe on a finished wood floor?
Standard blue painter's tape is the wrong tape for a finished wood floor if it's going to sit there for days. It grips hard enough that, left down too long, it can lift the floor finish when it comes up. For floors and anything delicate, painters use a low-adhesion tape, and the common one is yellow. Sherwin-Williams' guide to FrogTape colors rates the yellow delicate-surface tape as low adhesion with clean removal for up to 60 days, against 14 days for the brand's blue tape.
Our own rule is stricter than any label. On a wood floor, low-tack tape only, and it comes up the day the room is finished. Better still, the drop cloth or floor paper is taped to itself so no tape touches the floor at all. If your floors were refinished recently, ask the floor refinisher how long the finish needs before anything is taped to it.
How the tape comes up matters too. It should be pulled slowly, folded back on itself at a low angle. If paint has dried across the edge, a light score along the line with a utility knife keeps the new paint from peeling off with the tape.
What does good scraping look like?
Good scraping leaves edges that don't move. Run a putty knife or a fingernail along the edge of the old paint that's left. Nothing should lift. Then those edges get sanded smooth, which painters call feathering, so the step between old paint and bare wood doesn't show through the new coat as a hard line.
On the outside of a house, a careful painter scrapes, washes, then checks the scraped areas again once they're dry, because washing loosens paint that looked sound. Bare wood should be primed soon after scraping, not left out through weeks of sun and rain.
What you don't want to see is fresh primer over edges you can still lift with a fingernail. Paint goes on top of whatever is underneath it. If that's loose, the new paint is loose too.
Never climb above a six-foot ladder to check. For second-floor trim and eaves, look from the ground with binoculars, or ask the painter to send photos of the scraped areas before primer goes on. A painter who's proud of the prep is usually glad to.
What changes if the house was built before 1978?
A house built before 1978 may have lead paint under today's paint, and that changes how prep has to be done. The federal government banned consumer use of lead-based paint in 1978, and the older the house, the likelier it is. EPA estimates that 87% of homes built before 1940 are likely to have lead-based paint, 69% of homes built from 1940 to 1959, and 24% of homes built from 1960 to 1977. Plenty of houses in Summit, Chatham, Short Hills and Millburn fall into those first two groups.
Is lead paint dangerous if it isn't chipping?
Lead paint in good condition usually isn't the problem. EPA says lead-based paint in good shape is usually not a hazard, and that children can live safely in homes with lead paint as long as the paint is in good condition and surfaces are kept clean. The danger starts when it breaks down. The CDC explains that when lead paint peels and cracks, it makes lead dust, which children can swallow or breathe in.
Two exceptions matter. Painted surfaces that rub or get knocked, like window sashes, sills, doors and stair treads, can make dust even when they look fine. And painting prep is exactly the work that turns sound old paint into dust: scraping, sanding and stripping. A house where lead paint has sat quietly for decades can become a lead problem on prep day.
It's the same way we handle other specialist work, like restoring etched marble countertops.
Young children are most at risk. EPA notes that no safe level of lead in children has been identified, and the New Jersey Department of Health recommends testing children at ages 1 and 2.
How do you test chipping paint for lead?
Chipping paint is the easiest paint to test, because the broken edge of a chip shows every layer at once. Home lead test kits are sold at hardware stores. You rub the swab on the chip's edge, and if it changes color, lead is there. Lead usually sits in the older layers underneath, so testing only the top coat tells you very little.
Read the two results differently. A positive result is a clear reason to stop and call a certified firm before anyone sands. A negative result from a kit you used yourself is not an all-clear. The EPA recognizes three lead test kits, and relies on a negative result only when a certified renovator, inspector or risk assessor does the test.
For a definite answer, hire a lead inspector. In New Jersey that's a lead evaluation contractor certified by the Department of Community Affairs, who tests with an X-ray fluorescence instrument or sends paint chips to an accredited lab. Many certified painters skip testing altogether: they assume the old paint contains lead and prep the lead-safe way, which the rules allow.
While you wait, clean up what's already fallen. EPA's advice is to pick up chips and dust with a damp paper towel, wipe the spot with a clean wet one, never dry sweep, and use only a HEPA vacuum where chips or dust are visible.
What does lead-safe painting prep look like?
Lead-safe prep is required of most paid painters in older homes. Under the EPA's Renovation, Repair and Painting Rule, contractors who disturb more than six square feet of painted surface in a pre-1978 home must be certified and follow lead-safe work practices. Outside, the threshold is 20 square feet.
Lead-safe prep looks different from ordinary prep, and you can see the difference:
- Heavy plastic sheeting on the floor inside, or on the ground outside, with the work area closed off.
- Surfaces misted with water before scraping or sanding, so dust stays down.
- A HEPA vacuum on site, and power sanders only if they're shrouded and hooked up to one.
- No torches and no high-heat stripping. EPA's lead-safety guide for contractors prohibits open-flame burning, unshrouded power sanding and heat guns above 1100°F on lead paint.
- The EPA's Renovate Right pamphlet handed to you before work starts.
Ask to see the firm's lead-safe certification before the job is booked. It's a normal question, and a certified painter expects it. EPA's page for homeowners links to its directory of certified firms.
Who can remove lead paint?
Removing lead paint for good is called abatement. In New Jersey it's done by a lead abatement contractor certified by the Department of Community Affairs, and the state publishes its list of certified abatement contractors. EPA advises homeowners not to try removing lead-based paint themselves.
That's a different job from a lead-safe certified painter. The painter preps and repaints over old paint safely. The abatement firm removes it or seals it off permanently.
We don't do either ourselves. When a project in an older house disturbs old paint, we bring a lead-safe certified painter, and for removal, a state-certified abatement firm. We'd rather bring someone who holds the certification than work around it.
What does a properly patched wall look like?
A properly patched wall is flat when you look along it, not just when you look at it. Nail holes and dings are filled, then sanded flush. Deeper holes and cracks take two passes, because filler shrinks as it dries and the first pass leaves a shallow dip.
Here's the test anyone can do. Turn off the overhead light and hold a flashlight flat against the wall so the beam skims across the surface. Ridges, dips and sanding marks throw shadows. If you see them now, you'll see them after painting, more in eggshell or satin than in flat.
Gaps where trim meets the wall should get a thin bead of paintable caulk, smoothed with a finger or a wet rag. Holes in wood trim get wood filler, not caulk, because caulk can't be sanded flush and tends to leave a dimple.
Why does every patch need primer?
Every patch needs primer because filler and bare wood soak up paint differently from the painted wall around them. Paint straight over a patch dries duller, and the patch shows up as a flat spot when light hits the wall from the side. Painters call that flashing. A coat of primer over each patch, overlapping onto the wall around it, evens it out.
On prep day, ask one question: "Are the patches primed?" The answer should be yes. Primer is sometimes tinted gray or close to the new color, so primed patches may not look white.
Other spots that need primer before paint:
- Bare wood exposed by scraping.
- Water stains, once the leak has been found and fixed. These need a stain-blocking primer or they bleed back through.
- Knots in new wood trim, which can bleed through ordinary paint.
What should you check on prep day?
Before the first coat of color, walk the room with this list:
- Floors covered wall to wall with canvas, and no ordinary blue tape stuck to a wood floor.
- Covers and plates off, with their screws kept together.
- Old paint tight at every scraped edge, and the edges sanded smooth.
- Patches flat when you skim a flashlight across them.
- Every patch and bare spot primed.
- In a pre-1978 house, plastic sheeting, misting and a HEPA vacuum, from a certified firm.
If something's missing, say so before the color goes on. It's a five-minute conversation now and a repaint later.
When to call a professional
- Lead. If your house was built before 1978 and a project means scraping or sanding more than small spots, use a lead-safe certified painter. To remove lead paint, use a New Jersey certified abatement contractor. Don't dry-sand or heat-strip old paint yourself.
- A home test kit that turns positive. Stop any sanding or scraping and have a certified inspector or lead-safe painter look before work goes on.
- Paint that keeps peeling or bubbling in the same spot. That usually means moisture is getting behind it. Someone needs to find where it's coming from before anyone repaints.
- A water stain on a ceiling. The leak gets found and fixed first. Paint over an active leak just hides it for a while.
- A plaster crack that comes back after being patched. Worth having someone look at why it's moving.
- Anything high on the outside. Check from the ground and ask for photos. Don't climb above a six-foot ladder to inspect.
When a paint job needs more than a touch-up, Steward Projects is how we handle it: we look at the job properly, quote it in writing, and are in the room on the days that matter, including prep day.
Frequently asked questions
How long should prep take compared with painting?
On many jobs, prep takes as long as the painting or longer, especially in older houses with plaster walls and many layers of paint on the trim. A painter who starts rolling color on the first morning in a room full of visible holes and cracks has skipped something. Ask how many days of prep are in the quote.
Is paint with built-in primer enough?
Over clean, sound, previously painted walls in a similar color, it often is. Over patches, bare wood, stains or a big color change, a separate primer does a better job. Even some self-priming paints call for spot priming filled holes and cracks in their own instructions.
How long can painter's tape stay on?
It depends on the tape and the surface, and the clean-removal time is printed on the label. On a finished wood floor, use a low-adhesion tape and take it up the day the room is done. Standard blue tape shouldn't sit on a wood floor for days.
Is it safe to leave lead paint in place?
Usually, if it's in good condition. Lead paint that isn't chipping, peeling or rubbing is generally best left alone and kept clean. Keep an eye on windows, doors and stairs, where wear makes dust, and have any project that disturbs old paint done by a lead-safe certified firm.
Are home lead test kits accurate?
A positive result from a home lead test kit is worth taking seriously. A negative result from a kit you used yourself isn't proof the paint is lead-free, because the EPA only relies on negative results from certified professionals. For a definite answer, hire a New Jersey certified lead inspector.
If you'd rather someone else stood in the room on prep day and checked all of this, that's what we do.
The Home Steward is a home management service based in Summit, New Jersey, run by Sebastian and Kory, caring for homes in Summit, Chatham, Short Hills and Millburn.